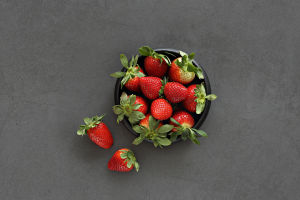
This homemade raspberry jam recipe highlights the natural flavor of raspberries without using pectin, lemon juice, or any unnecessary additives.
Eleanor Topp, co-author of The Complete Book of Year-Round Small-Batch Preserving, explains avoiding pectin reduces the need for extra sugar, resulting in an intensely fruity spread. Made with just raspberries and sugar, this recipe captures the essence of summer.
Recipe Information
Total Time: 20 minutes plus canning time Yield: Makes 4 cups (1 L).
Ingredients
- 4 cups (800 g) granulated sugar - 4 cups (480 g) raspberries.
Preparation
Step 1: Prepare the Canning Jars
Partially fill a boiling-water canner with hot water. Place four 8-oz. canning jars in the canner (or work in batches if needed).
Boil water over high heat and sterilize jars for at least 10 minutes.
Remove jars with tongs and transfer upside down to a wire rack.
Tip: If you lack a canner, tie several bands together with string or use a small round wire rack in the bottom of a large Dutch oven. Ensure the pan is tall enough for jars to be submerged under 2" (5 cm) of water.
Step 2: Warm the Sugar
4. Place 4 cups (800 g) of granulated sugar in a shallow ovenproof pan and warm it in a 250°F (120°C) oven for 15 minutes to help it dissolve more efficiently.
Step 3: Cook the Raspberries
5. In a large stainless steel or enamel saucepan, bring 4 cups (480 g) of raspberries to a rolling boil over high heat.
6. Mash the berries with a potato masher as they heat. Boil hard for 1 minute, stirring constantly.
7. Add the warm sugar and return to a boil. Cook until the mixture thickens, about 5 minutes.
Step 4: Test the Jam
8. To check if the jam is done, dip a chilled spoon into the mixture, lift it horizontally, and observe the drips. When the drops thicken and merge before falling off, the jam is ready.
Step 5: Fill the Jars
9. Ladle the hot jam into sterilized jars, leaving ½" (1 cm) headspace.
10. Remove air bubbles by sliding a clean spatula between the jar and the jam. Adjust the headspace if necessary.
11. Wipe the rims, center the lids, and tighten the bands to fingertip tightness.
Step 6: Process the Jars
12. Place jars in the canner, ensuring they are covered by 1–2" (2.5–5 cm) of water.
13. Cover and bring the water back to a boil. Process for 5 minutes.
Step 7: Cool and Store
14. Remove jars and cool on a surface lined with newspaper or paper towels for 24 hours.
15. Check seals (sealed lids will be concave), label jars with the contents and date, and store them in a cool, dark place.
Dear Lykkers, enjoy this vibrant, fruit-forward jam that’s perfect for any season!


